018.Unit test cho Rails (CRUD).

Ở bài này chúng ta sẽ cùng thử viết unit test cho api CRUD. Dành cho các bạn mới thì phần đầu sẽ hướng dẫn tạo api CURD, bạn nào chỉ quan tâm phần viết test thì có thể tới luôn phần 2
1. Tạo api CRUD
Để cho gọn gàng, thì mình sẽ dùng luôn những hàm hỗ trợ của Rails, module User với 2 trường đơn giản là name và email chắc là đủ.
rails generate model User name:string email:string
#      invoke  active_record
#      create    db/migrate/20240921150945_create_users.rb
#      create    app/models/user.rb
#      invoke    rspec
#      create      spec/models/user_spec.rb
#      invoke      factory_bot
#      create        spec/factories/users.rb
Lưu ý là chúng ta sẽ có thêm file spec/factories/users.rb từ gem factory_bot_rails trong Gemfile từ bài trước.
Trong bài này, mình chỉ test controller, nên là các bạn xóa file spec/models/user_spec.rb đi. Có thể trong tương lai, chúng ta sẽ quay lại thảo luận về việc test model.
Tiếp tục việc chuẩn bị Api CRUD, các bạn chạy migrate và viết controller
rails db:migrate
rails generate controller Users
# /config/routes.rb

Rails.application.routes.draw do
  resources :users
end
# /app/controllers/users_controller.rb

class UsersController < ApplicationController
  before_action :set_user, only: [:show, :update, :destroy]

  def index
    @users = User.all
    render json: @users
  end

  def show
    render json: @user
  end

  def create
    @user = User.new(user_params)

    if @user.save
      render json: @user, status: :created
    else
      render json: @user.errors, status: :unprocessable_entity
    end
  end

  def update
    if @user.update(user_params)
      render json: @user
    else
      render json: @user.errors, status: :unprocessable_entity
    end
  end

  def destroy
    @user.destroy
    head :no_content
  end

  private

    def set_user
      @user = User.find(params[:id])
    end

    def user_params
      params.require(:user).permit(:name, :email, :password)
    end
end
Thử nhanh phát nào
# Tạo mới một user
curl -X POST http://localhost:3000/users \
-H "Content-Type: application/json" \
-d '{"user": {"name": "Jane Doe", "email": "jane@example.com"}}'
# {"id":1,"name":"Jane Doe","email":"jane@example.com","created_at":"2024-09-22T16:14:30.080Z","updated_at":"2024-09-22T16:14:30.080Z"}


# Get list users
curl -X GET http://localhost:3000/users
# [{"id":1,"name":"Jane Doe","email":"jane@example.com","created_at":"2024-09-22T16:14:30.080Z","updated_at":"2024-09-22T16:14:30.080Z"}]
2. Viết request spec đầu tiên
Rails có cả controller spec và request spec, TL;DR controller spec là tên gọi cũ của request spec, và từ Rails 5, khi ra mắt Rspec 3.5 thì team phát triển khuyến khích sử dụng request spec thay vì controller spec.
Như đã nói ở trên, chúng ta sẽ dùng request spec, cụ thể là request có endpoint users.
rails g rspec:request user
# create  spec/requests/users_spec.rb
Chúng ta sẽ có file như sau
# /spec/requests/users_spec.rb
require 'rails_helper'

RSpec.describe "Users", type: :request do
  describe "GET /users" do
    it "works! (now write some real specs)" do
      get users_path
      expect(response).to have_http_status(200)
    end
  end
end
Nếu may mắn thì không cần chỉnh sửa gì cả, chạy lệnh bundle exec rspec, các bạn sẽ kết quả pass
Finished in 0.02838 seconds (files took 1.61 seconds to load)
2 examples, 0 failures

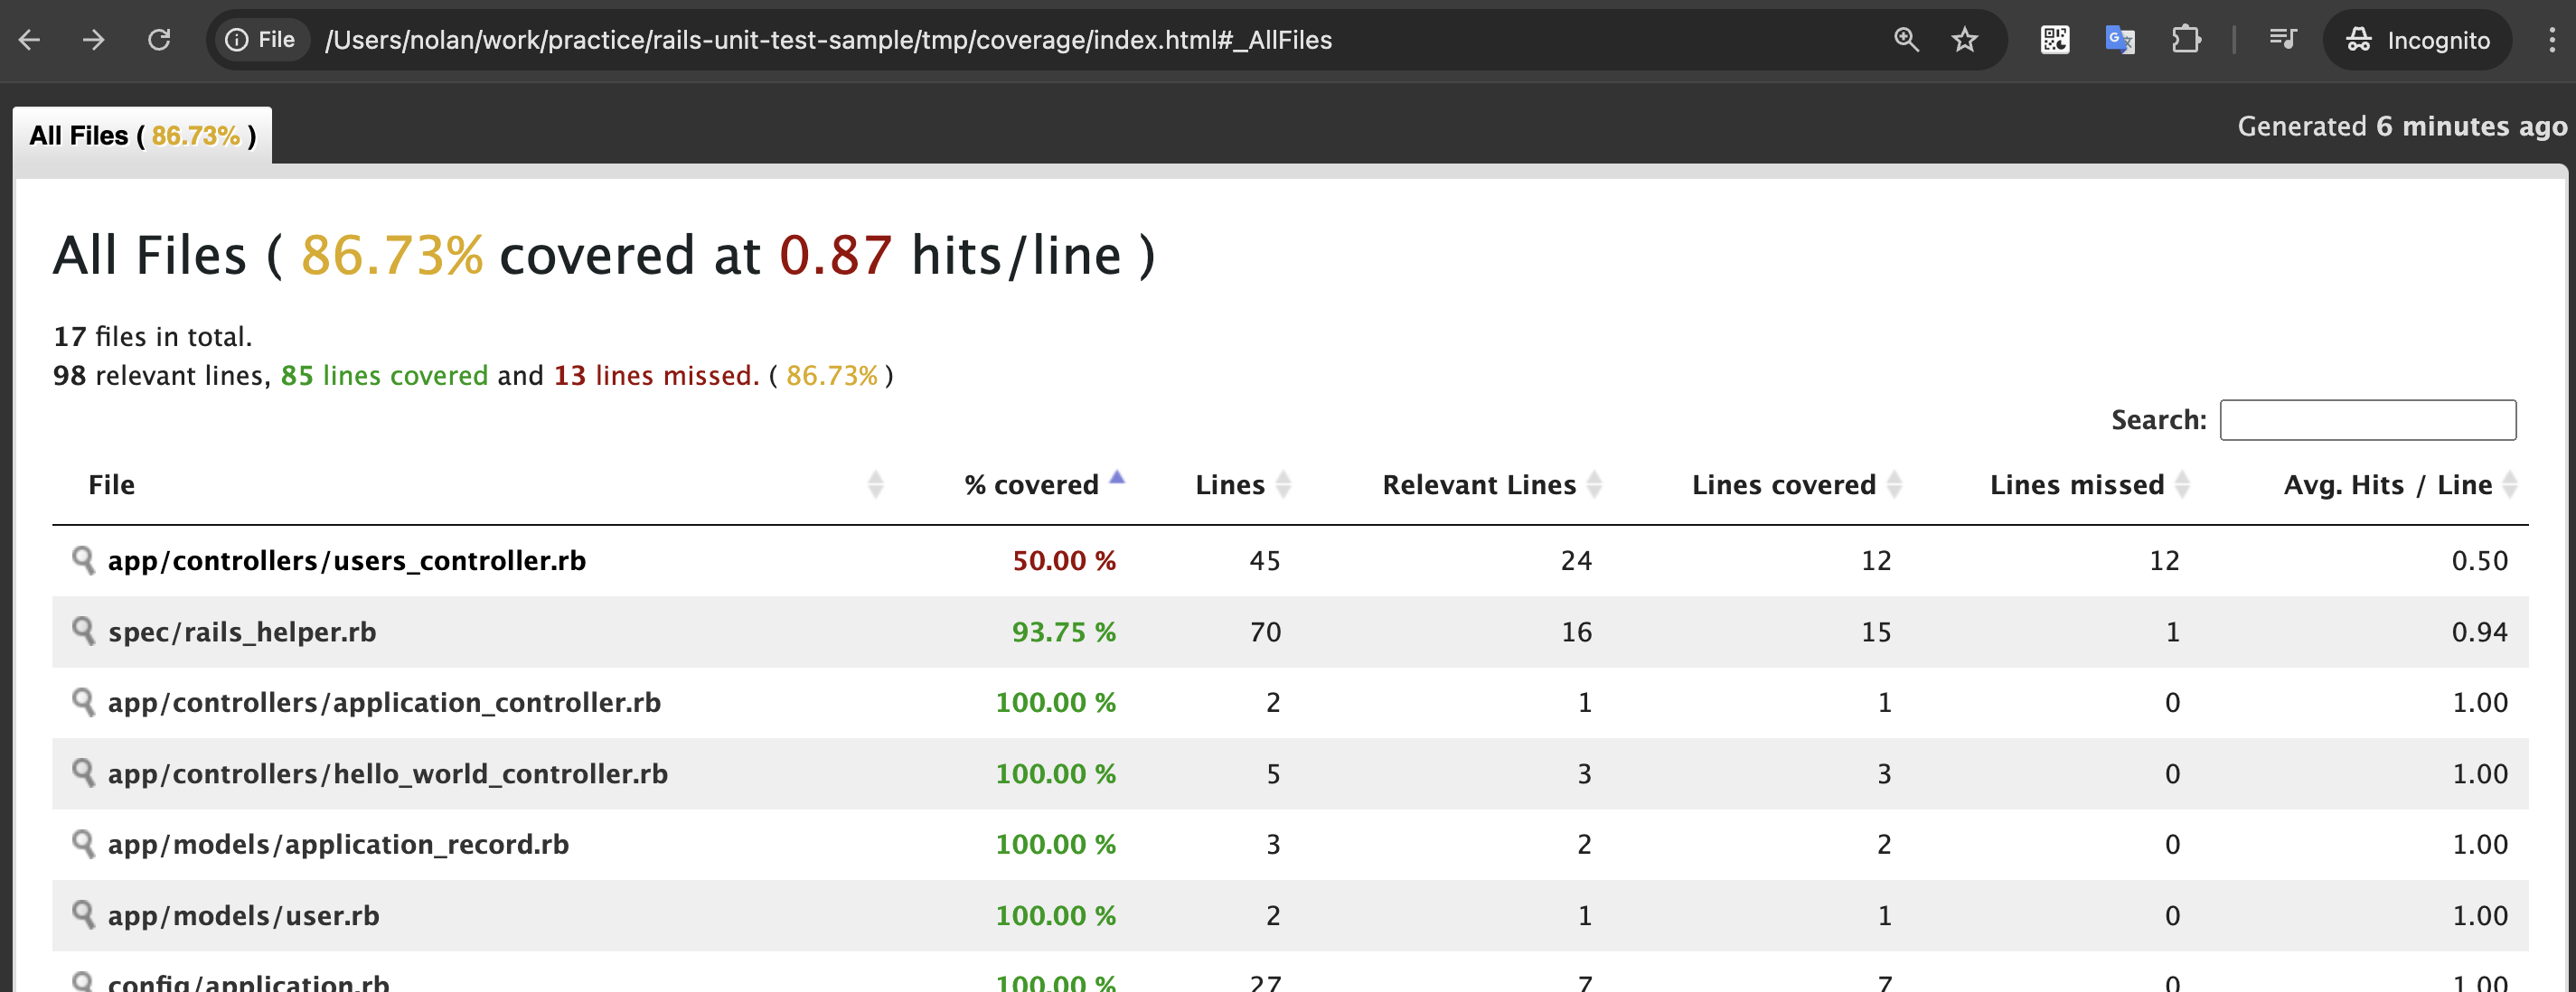
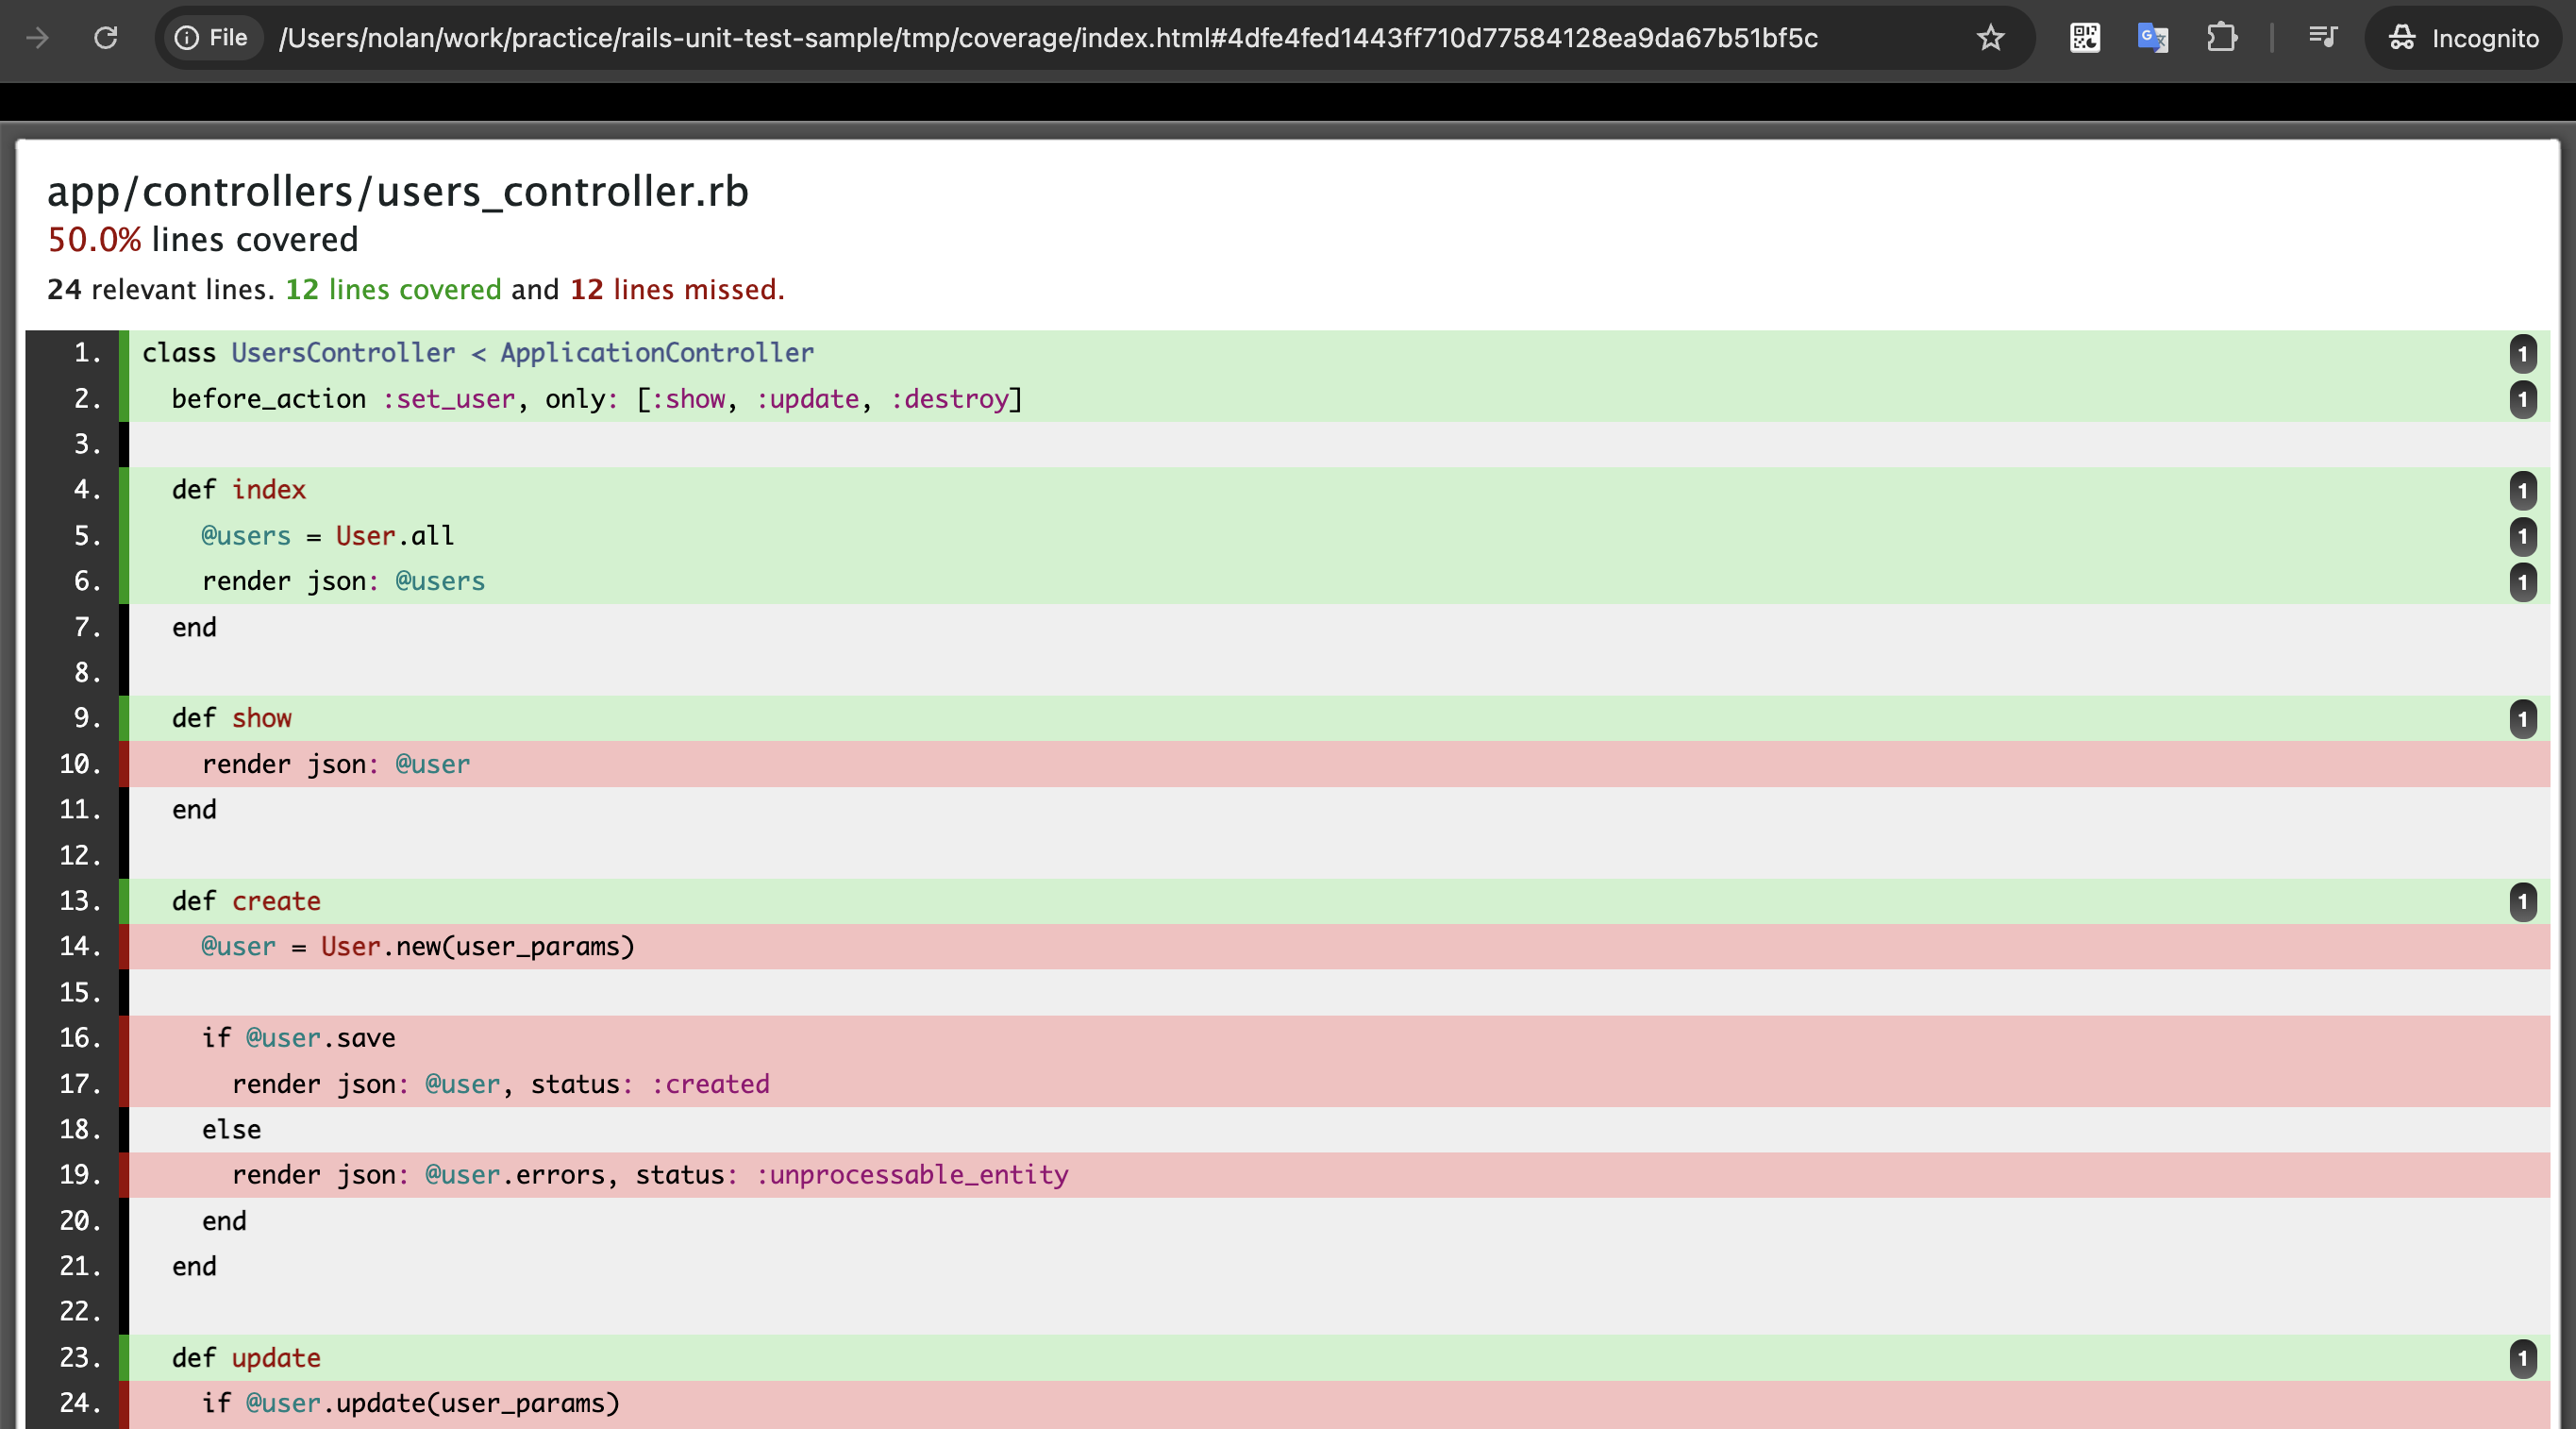
Coverage report generated for RSpec to /Users/nolan/work/practice/rails-unit-test-sample/tmp/coverage. 85 / 98 LOC (86.73%) covered.
Coverage report generated for RSpec to /Users/nolan/work/practice/rails-unit-test-sample/tmp/coverage/coverage.json. 85 / 98 LOC (86.73%) covered.
Coverage report Rcov style generated for RSpec to /Users/nolan/work/practice/rails-unit-test-sample/tmp/coverage/rcov


3. Phân tích kĩ một chút
Giờ hãy cùng phân tích một chút. Thay vì dùng lệnh rails g rspec, các bạn hoàn toàn có thể tự tạo một file đuôi _spec.rb và đặt đâu đó trong thư mục spec. Về cơ bản, khi chạy bundle exec rspec, tất cả các file này đều sẽ được chạy qua. Thường thì mình cũng làm vậy, và đặt đường dẫn tương đương với file cần test, như là spec/controllers/users_controller_spec.rb, spec/models/user_spec.rb, …
Cùng check qua file /spec/requests/users_spec.rb vừa tạo ở trên.
RSpec.describe "Users", type: :request do       # Mô tả module của request
  describe "GET /users" do                      # Mô tả request
    it "works! (now write some real specs)" do  # Mô tả test case
      get users_path                            # Thực hiện request
      expect(response).to have_http_status(200) # Kiểm tra response với kết quả mong muốn
    end
  end
end
Các bạn hoàn toàn có thể thay đổi text ở các phần mô tả, phần này sẽ không ảnh hưởng gì đến kết quả test của các bạn, nhưng tốt nhất vẫn nên viết sao cho khoa học, để dễ dàng có thể quản lý về sau.
Giờ thì hoàn thiện các happy case cho users_controller nào
require 'rails_helper'

RSpec.describe "Users", type: :request do
  let!(:user) { User.create(name: 'John Doe', email: 'john@example.com') }

  describe "GET /users" do
    it "returns a list of users" do
      get "/users"
      expect(response).to have_http_status(200)
      expect(JSON.parse(response.body).size).to eq(1)
    end
  end

  describe "GET /users/:id" do
    it "returns a specific user" do
      get "/users/#{user.id}"
      expect(response).to have_http_status(200)
      expect(JSON.parse(response.body)['name']).to eq('John Doe')
    end
  end

  describe "POST /users" do
    it "creates a new user" do
      post "/users", params: { user: { name: 'Jane Doe', email: 'jane@example.com' } }
      expect(response).to have_http_status(201)
      expect(JSON.parse(response.body)['name']).to eq('Jane Doe')
    end
  end

  describe "PUT /users/:id" do
    it "updates the user" do
      put "/users/#{user.id}", params: { user: { name: 'John Updated' } }
      expect(response).to have_http_status(201)
      user.reload
      expect(user.name).to eq('John Updated')
    end
  end

  describe "DELETE /users/:id" do
    it "deletes the user" do
      user_count = User.count
      delete "/users/#{user.id}"
      expect(User.count).to eq(user_count - 1)
      expect(response).to have_http_status(:no_content)
    end
  end
end
Khá là tương đồng với ví dụ ban đầu của chúng ta, mình tin là mọi người đều có thể hiểu được 5 test case này.
Ở đây có thêm một thứ mới, đó là let! Mình thường sử dụng let!, let, hoặc các biến để mô phỏng kịch bản test. (Những trường hợp như tạo trước record để test api xóa, update. Hoặc là tạo trước một Catergory để test api tạo mới một bài Post, …)
Về phạm vi, các bạn có thể đặt let!/let ở bên trong một describe (hoặc một context, 2 cái này như nhau), và giá trị của nó sẽ tồn tại khi chạy xong cái hết cái describe đó. Ở ví dụ trên thì mình đặt let! ở cái describe ngoài, nên cả 5 test case đều có thể gọi user. Nếu bạn có cả trong và ngoài, thì cái bên trong sẽ override cái ở ngoài.
Về vòng đời, let! sẽ chạy luôn phần code ở trong block ngay khi define. Còn let thì chờ tới khi được gọi mới chạy. Nếu bạn binding.pry ở sau let! và let để check User.all, các bạn sẽ thấy khác biệt.
Và các giá trị của let!/let sẽ được cache (memoized) lại trong một it, ví dụ là bạn gọi user bao nhiêu lần trong cái it đó thì code trong block cũng không chạy lại. Nhưng khi chạy sang một it khác thì code trong block sẽ được chạy lại, và gán giá trị mới cho let!/let.
Tham khảo dưới đây.
$count = 0
RSpec.describe "let" do
  let!(:count) { $count += 1 }

  # count will not change no matter how many times we reference it in this it block
  it "cached in same it" do
    expect(count).to eq(1) # evaluated (set to 1)
    expect(count).to eq(1) # did not change (still 1)
  end

  # count will be set to 2 and remain 2 untill the end of the block
  it "and change in another it" do
    expect(count).to eq(2) # evaluated in new it block
  end
end
Thường thì mình không sử dụng let, vì mình muốn chắc chắn là data test của mình được tạo trước khi gọi api, thậm chí là thừa còn hơn thiếu. Và mình cũng không đặt let! ở những describe/context quá to, chứa nhiều test case, để tránh define thừa quá nhiều data test cho những test case đơn giản.


Comments